In today’s competitive e-commerce market, high-quality apparel images play a critical role in influencing customers’ buying decisions. Using Ghost Mannequin editing is one of the best ways to present clothing professionally. By ghosting the mannequin digitally, brands are able to emphasize the clothing’s intricate parts like the collars, sleeves, folds, and contours. This method of editing provides a clearer showcase than traditional photography.
Flat lay photography often lacks depth & fails to convey the true fit & structure of apparel. In contrast, the ghost mannequin effect creates a lifelike representation, helping customers visualize how the clothing will look when worn.
This technique improves visual clarity, user experience & trust. This guide will explain the ghost mannequin workflow in a step-by-step manner, from capturing images to applying the invisible mannequin using Photoshop. After reading the whole thing, readers will easily understand why this method is indispensable for modern online fashion retail.
What is Ghost Mannequin Effect?
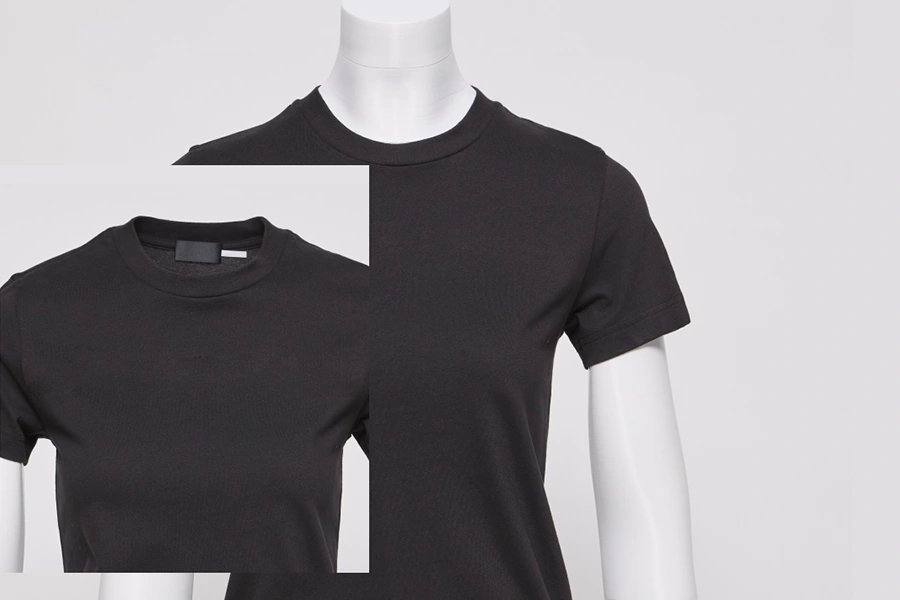
The Ghost Mannequin Effect is a digital photo editing technique that removes the mannequin from the apparel images while preserving the natural shape, structure & details of the clothing. By combining multiple images of the garment, editors can create a lifelike representation of the product. When you see the final result of the clothes, it’ll seem as if an invisible model is wearing them. In return, customers get a clear & realistic view of the item.
This effect is significant in e-commerce photography, where buyers can’t physically touch or try on products. By presenting garments in a structured, 3D-like manner, the ghost mannequin effect helps customers understand how clothes will fit, how collars sit & how fabrics drape naturally. Unlike flat lay product photography, which can make clothing appear flat or distorted, ghost mannequin images at scale improve customer experience, reducing returns & boosting online sales.
Ghost Mannequin vs. Flat Lay Product Photography:
When it comes to apparel presentation, 2 common methods dominate in the market: Ghost Mannequin Photography & Flat Lay Product Photography. Both of these serve unique purposes, but they deliver very different results. Understanding their strengths & weaknesses helps ecommerce brands decide which method best supports their visual strategy.
Definition of Each Method
Ghost Mannequin Photography: In this technique, garments are photographed on a mannequin. Then, the mannequin is later removed through editing. Using the professional ghost mannequin process, editors combine multiple shots (main image plus inner-neck or sleeves) to create a 3D lifelike view of the clothing.
Flat lay Photography: In this technique, garments are laid flat on a surface & photographed from above. It is a simple approach that focuses more on styling & arrangement than structure.
Comparison of Pros & Cons
| Comparison | Pros | Cons |
| Ghost Mannequin Photography (Invisible Mannequin Technique) | Creates realistic, 3D-like product images. Highlights fit, Drape & Design details. Maintains Consistency across large e-commerce catalogs. Enhances customer trust with a professional appearance. | Requires advanced editing skills & more time. Needs additional images like collars, inner-neck, sleeves, & back inserts. |
| Flat Lay Product Photography | Quick, low-cost & beginner-friendly. Allows creative styling with props & backgrounds. Works well for lifestyle or social media campaigns. | Garments appear flat with little depth. Can distort the true fit & shape of clothing. Inconsistent results if not styled carefully. |
Why Is the Ghost Mannequin Effect So Popular?
While both methods have value in each market. The ghost mannequin workflow is the industry standard for e-commerce. Customers want to see how a garment naturally fits, not just how it looks on a table. Flat lay images may be appealing for marketing campaigns, but they fail to deliver the structural accuracy shoppers rely on when making purchasing decisions.
By applying the ghost mannequin process, brands ensure their catalogs look polished, uniform & trustworthy. This approach increases product authenticity across the market. Also, this improves conversion rates & helps maintain a consistent visual identity among thousands of products. For these reasons, Ghost Mannequin technique is the preferred choice for fashion retailers worldwide.
Why Need to use the Ghost Mannequin Effect in Ecommerce?
In e-commerce marketplace, customers rely heavily on product images to make purchase decisions. As they can’t touch, feel, or try on the clothes, the image must clearly communicate every detail. This is exactly why using the ghost mannequin effect in e-commerce has become essential. This effect can’t be recreated by flat lay or casual product photography.
Improved User Experience
When shoppers see clothing displayed with the ghost mannequin effect, they gain a realistic understanding of how the garment will fit. The invisible mannequin presentation shows collars, shoulders, sleeves & hems in their natural position.
This reduces uncertainty & helps customers visualize the product as if it were being worn, improving confidence in their buying decision.
Visual Clarity & Brand Consistency
The workflow removes all distractions like mannequins, props, or uneven folds. The focus remains solely on the product. This clarity ensures that online catalogs look uniform & professional across hundreds of items.
For fashion retailers such as ASOS, ZARA, and H&M maintaining consistency in product imagery has become part of their brand identity, setting them apart from competitors.
Higher Conversions & Fewer Returns
Clear & structured images lead to better conversions. Customers are more likely to purchase when they trust what they see. In fact, professional ghost mannequin images reduce return rates as buyers receive products that match their visual expectations.
A well-executed ghost mannequin effect step-by-step process helps fashion brands turn browsers into loyal customers.
In summary, the professional ghost mannequin process is not just about aesthetics, as it directly impacts users’ experience, brand reputation & ecommerce performance. That is why modern online retailers consider it a vital part of their product presentation strategy.
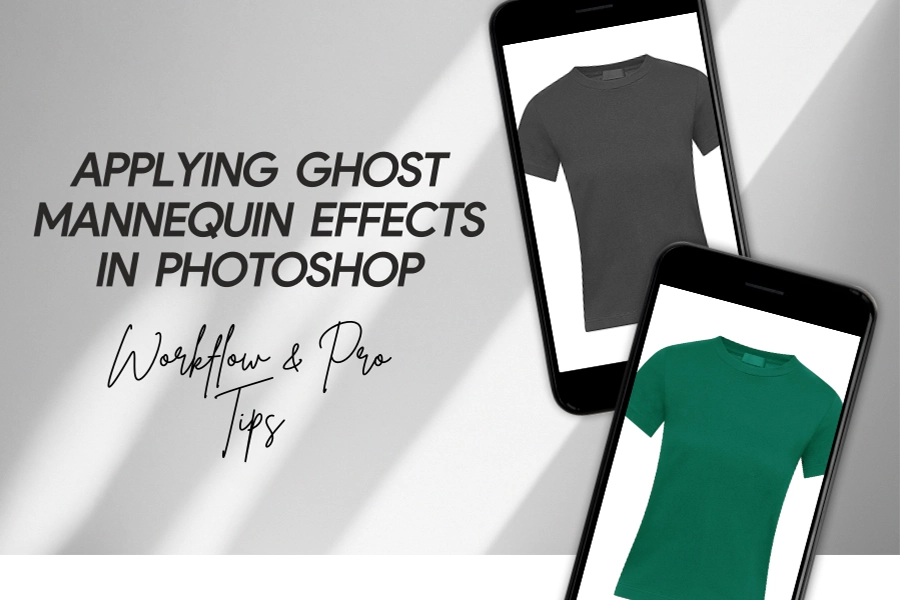
Applying Ghost Mannequin Effects in Photoshop: Step-by-Step
The ghost mannequin effect is a professional photo editing technique widely used in e-commerce, apparel & product photography. it allows products, especially clothing items. This makes the clothes appear naturally worn but without any visible mannequin or model. This clean & realistic look enhances customer focus on the product details, fit & texture.
This step-by-step guide walks you through the ghost mannequin workflow, ensuring you can apply it efficiently while also learning the important Photoshop tools & keyboard shortcuts that make the process faster.
Step 1: Import Product & Inner-Neck Images
To begin, open Photoshop & Import the 2 required images:
1. Main product shot (Clothing on Mannequin).
2. Inner-neck shot (Photograph of the inside/back area of the garment)
Both images should be taken from the same angle with consistent lighting. This consistency makes the final blending flawless.
Shortcut Tip:
1. Use (Windows) Ctrl + O / (Mac) CMD + O = to quickly open your files.
2. Drag both images into a single Photoshop workspace using the Move Tool (V).
This step is the foundation of the ghost mannequin workflow, as you need both views to create the hollow & realistic effect.
Step 2: Organize Layer & Select the Main Product
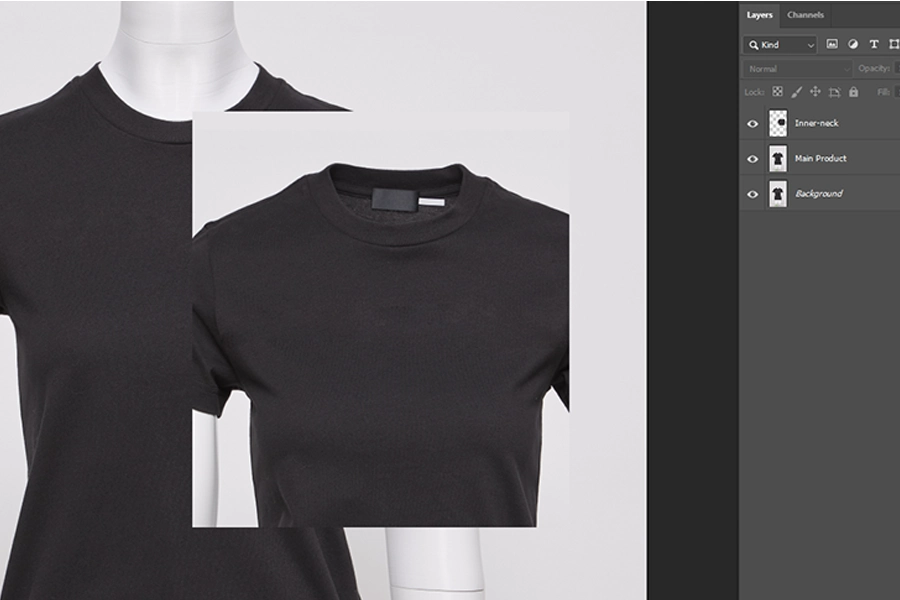
Once your images are open, drag the main product image into the workspace first. Place the inner-neck image on a separate
layer beneath it for later use. Renaming the layers like product & inner-neck. This helps avoid confusion.
Shortcut Tip:
1. Use F7 to show the Layers Panel if it’s hidden.
2. Rename a layer by double-clicking its name directly.
Keeping your project well-organized ensures smooth editing, especially when dealing with multiple selections & masks.
Step 3: Create a Clean Selection Using the Pen Tool
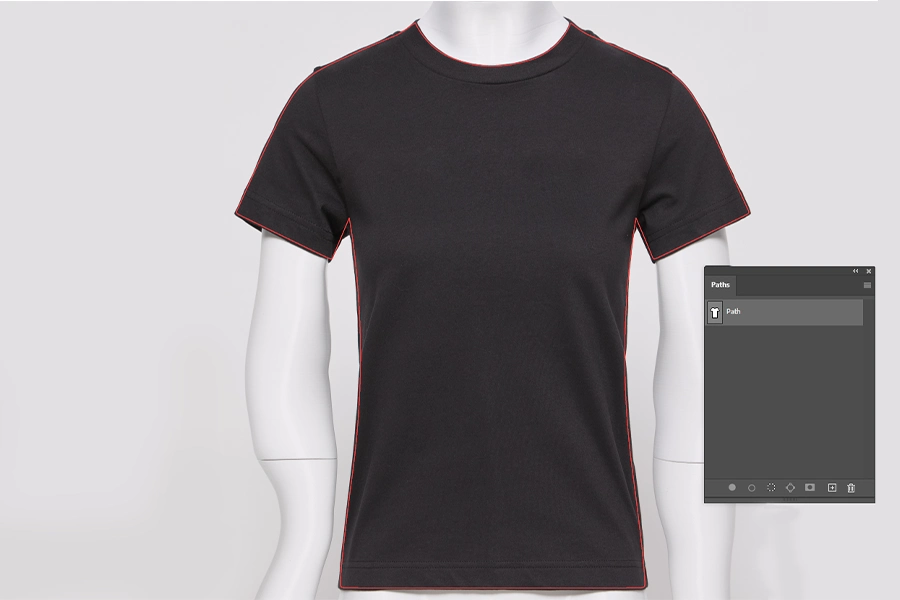
The Pen Tool (P) is the most precise way to cut out clothing from the mannequin. Carefully trace around the outline of the product,
clicking to place anchor points & dragging to adjust curves.
Why Pen Tool?: It provides smooth vector paths & allows you to refine your selection without pixelation.
Shortcut Tip:
1. Key P activates the Pen Tool.
2. Once the path is complete, press (Windows) Ctrl + Enter / (Mac) CMD + Return to convert it into a selection.
This selection step is crucial for isolating the clothing while removing any part of the mannequin.
Step 4: Apply a Layer Mask to Hide the Mannequin
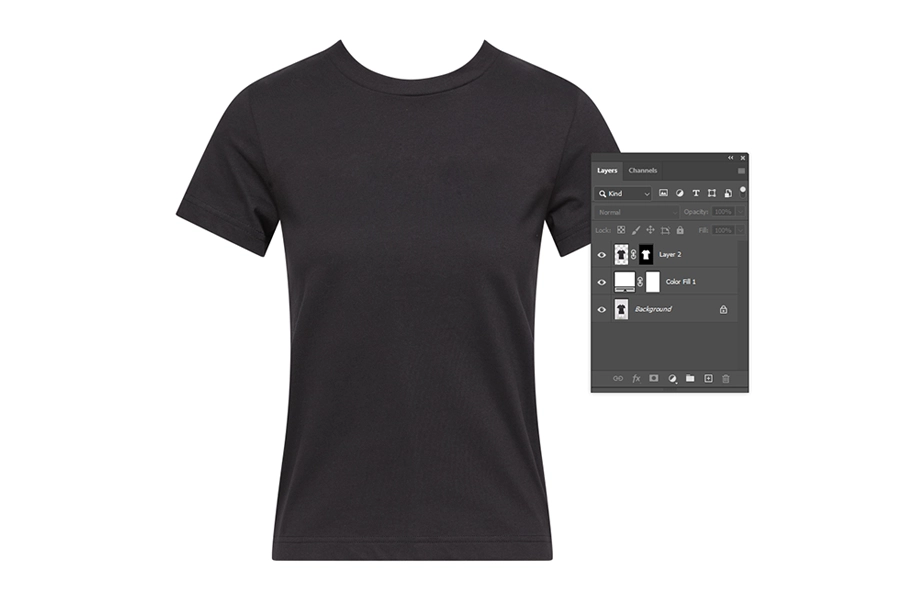
With the product selected, apply a Layer Mask to hide the unwanted mannequin portions.
A mask is a non-destructive, meaning you can refine edges later without permanently deleting pixels.
Shortcut Tip:
1. Click the Add Layer Mask button of the Layers Panel.
2. Either use the above one or press Ctrl + Alt + G (Windows) / CMD + Option + G (Mac) to create a clipping mask.
This step removes the mannequin while keeping the garment intact.
Step 5: Add the Inner-Neck Layer Above the Base
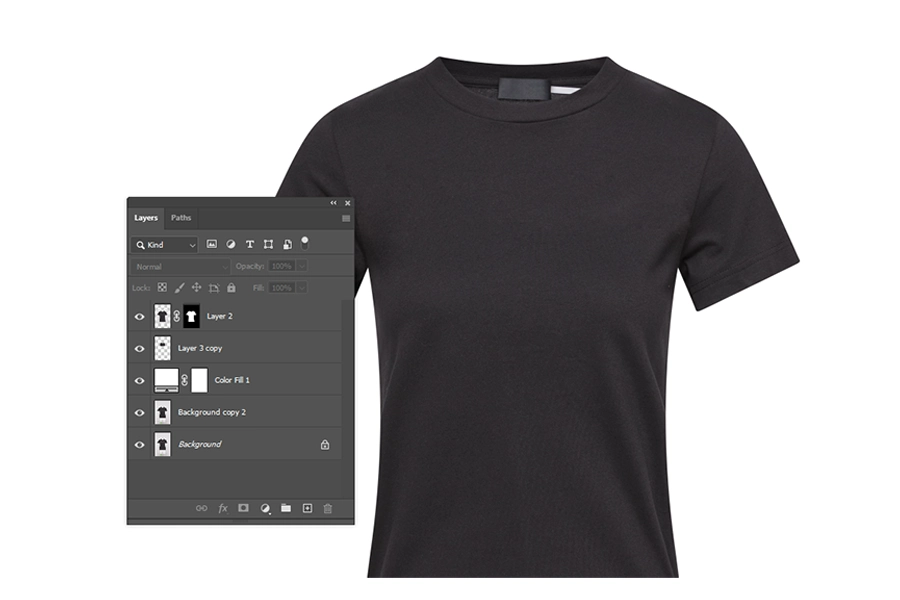
Now bring in the inner-neck image layer & place it directly beneath the product layer.
This image fills in the hollow space where the mannequin’s neck or body would be visible.
Aligning it properly makes the ghost mannequin effect look natural.
Shortcut Tip:
1. Use the Move Tool (V) to drag & position the layer.
2. Hold Shift while dragging to keep alignment constrained.
Step 6: Align & Blend the Two Layers Smoothly
The most delicate part of the ghost mannequin workflow is aligning the garment’s edges with the inner-neck shot.
Use Free Transform to resize, rotate, or distort the inner-neck piece until it matches perfectly.
Shortcut Tip:
1. Press (Windows) Ctrl + T / (Mac) CMD + T for free transform.
2. Right-click during transform to use Warp or Distort for more control.
3. Hold Shift + Alt (Shift + Option) while resizing to scale from the center.
This ensures both images merge into one seamless product visualization.
Step 7: Smooth Wrinkles & Fix Imperfections

Clothing often has wrinkles & folds that distract from its shape. Use the Clone Stamp Tool (S) or Healing Brush Tool (J) to smooth
surfaces & fix texture imperfections.
Shortcut Tip:
1. (Windows) Alt + Click / (Mac) Option + Click with the Clone Stamp to define a source point.
2. Shift + J cycles between healing tools.
This step improves the garment’s presentation, making it look polished for e-commerce display.
Step 8: Adjust Lighting, Shadows & Highlights
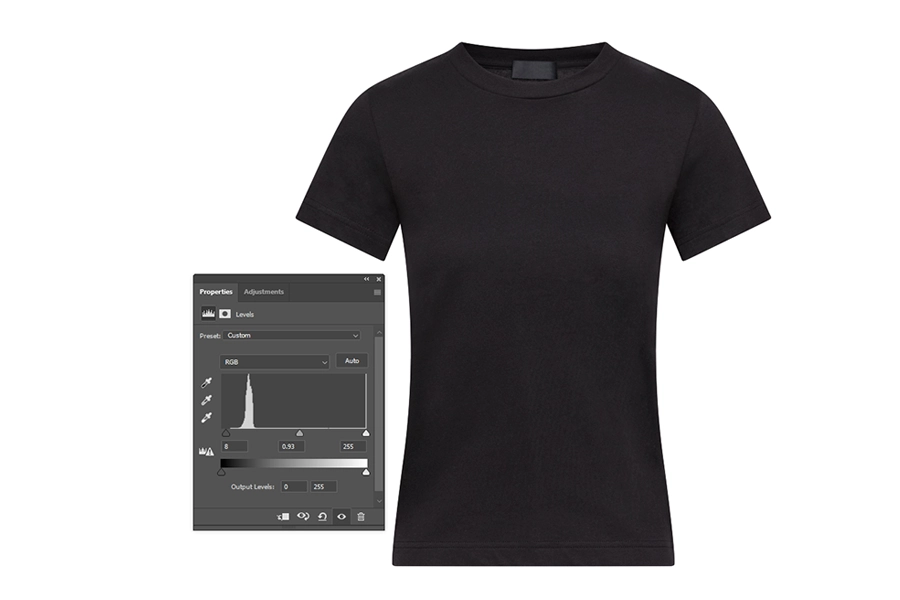
Consistency in lighting improves the realism of the ghost mannequin effect. If shadows or highlights differ between the base
& inner-neck layers. Correct them by using Curves & Levels.
You can also paint soft shadows using a low-opacity black brush to simulate natural depth. For painting shadows, use a New Layer.
Shortcut Tip:
1. Curves: (Windows) Ctrl + M / (Mac) CMD + M.
2. Levels: (Windows) Ctrl + L / (Mac) CMD + L.
3. New Layer: (Windows) Shift + Ctrl + N / (Mac) Shift + CMD + N.
Step 9: Color Correct for Natural & Consistent Appearance
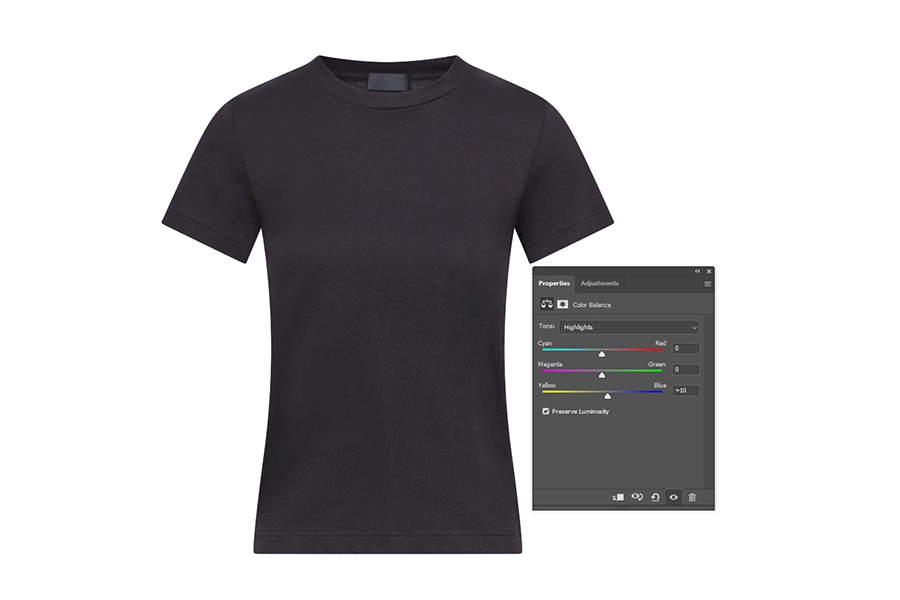
Color mismatches can occur if lighting conditions differ slightly between shots. Use Hue/Saturation
& Color Balance to match tones across both layers.
Shortcut Tip:
1. Saturation – Lightness – Hue: Adjust by using these (Windows) Ctrl + U / (Mac) CMD + U.
2. Color Balance: Modify by using these (Windows) Ctrl + B / (Mac) CMD + B.
This improves the clothing looks natural & consistent, free of distracting tone shifts.
Step 10: Export for Web & E-commerce Use
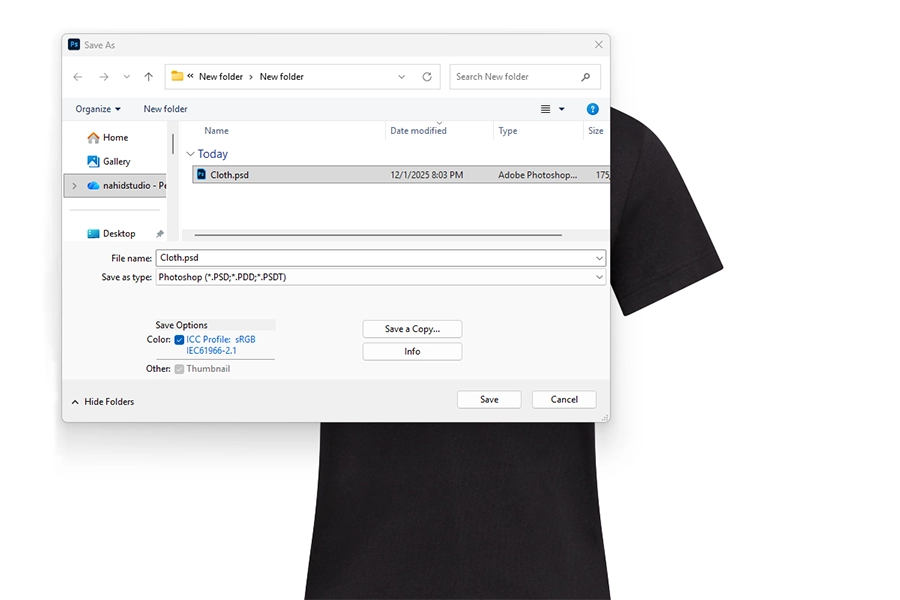
Once satisfied, save your project in PSD format for future edits. Then export high-quality images for web & Print.
Shortcut Tip:
1. Save As (for PSD Backup): (Windows) Ctrl + Shift + S / (Mac) CMD + Shift + S.
2. Save for Web & Print (optimized JPEG/ PNG): (Windows) Ctrl + Alt + Shift + S / (Mac) CMD + Option + Shift + S.
High-resolution yet optimized exports confirm fast loading speeds on e-commerce platforms while retaining visual quality.
Keyboard Shortcut Reference Table:
| Tools / Actions | Windows Shortcut | Mac Shortcut |
| Open File | Ctrl + O | CMD + O |
| Move Tool | V | V |
| Show Layers Panel | F7 | F7 |
| Pen Tool | P | P |
| Convert Path to Selection | Ctrl + Enter | CMD + Return |
| Add layer Mask | Alt + Click Mask | Option + Click |
| Free Transform | Ctrl + T | CMD + T |
| Refine Edge – Select – Mask | Ctrl + Alt + R | CMD + Option + R |
| Brush Tool | B | B |
| Eraser Tool | E | E |
| Clone Stamp Tool | S | S |
| Healing Tools | J | J |
| Healing Tools Cycle | Shift + J | Shift + J |
| Curves | Ctrl + M | CMD + M |
| Levels | Ctrl + L | CMD + L |
| Hue – Saturation | Ctrl + U | CMD + U |
| Color Balance | Ctrl + B | CMD + B |
| New Layer | Shift + Ctrl + N | Shift + CMD + N |
| Save As | Ctrl + Shift + S | CMD + Shift + S |
| Save for Web & Print | Ctrl + Alt + Shift + S | CMD + Option + Shift + S |
By following this guide, you can transform basic product photos into professional e-commerce visuals. The combination of precise selection, blending & color correction improves the look of natural clothing. This makes the product always ready for online & print.
The ghost mannequin might seem technical at first, but with practice & mastery of Photoshop shortcuts, anyone can speed up the editing process while delivering flawless results every time.
Why Outsourcing Ghost Mannequin Editing is the Best Choice
for Businesses?
Outsourcing ghost mannequin editing to a professional photo editing company is more than just a cost-saving decision.
This is considered a scalable, scientific & efficiency-driven solution for fashion brands, e-commerce stores & photography studios.
Cost-Effective & Scalable
Hiring an in-house team for ghost mannequin workflows requires salaries, software licenses, and training.
By outsourcing, companies only pay for the edited images they need. This reduces fixed costs, as image pricing starts at $0.50.
It ensures scalability, as brands may need between 50 and 5,000 images a day, which editing companies can handle efficiently.
Access to Specialized Expertise
Professional editing companies employ editors & retouchers who specialize in ghost mannequin & other methods. This ensures the companies in precision of collar joints, neck inserts, sleeve alignment & symmetry. This guarantees them pixel-perfect edits that elevate product presentation, especially for online stores where visual impact directly influences sales.
Faster Turnaround Times
Outsourcing ensures that bulk edits are delivered in record time. With dedicated ghost mannequin editing teams working across different time zones, companies benefit from faster delivery, often overnight.
This speed keeps fashion brands & e-commerce businesses ahead of their publishing schedules.
Non-Destructive Editing Standards
Most professional editors use non-destructive workflows, including layer masks, smart objects & adjustment layers. This protects original files & provides flexibility to refine details. The result is a natural & flawless invisible mannequin effect that looks consistent across product catalogs.
Quality Assurance & Consistency
Editing companies follow strict quality control workflows from color correction to background consistency. This allows every image to maintain the same brand identity. When all apparel images look consistent, customers experience a sense of trust & professionalism that drives purchase decisions.
Focus on Core Business Operations
By outsourcing ghost mannequin edits, brands & studios can focus on photography, marketing & business growth. This prevents burnout
in creative teams & improves overall workflow efficiency. Instead of spending hours editing, companies can channel efforts into product development, customer engagement & scaling their e-commerce reach.
SEO & Marketing Advantage
High-quality ghost mannequin images improve website engagement, reduce bounce rates & increase conversion rates. Search engines
favor professional, optimized visuals. Thus, outsourcing ghost mannequin editing directly supports e-commerce SEO strategies.
Outsourcing ghost mannequin editing services is not just a cost-saving measure. This is a strategic business decision that ensures
scalability, precision, quality & speed, all while reducing internal pressure on creative teams. For companies looking to stand out in the online marketplace, partnering with an expert ghost mannequin editing company is the smartest way forward.
Best Practices During Ghost Mannequin Editing & Pro Tips
A professional ghost mannequin process is not just about removing the mannequin but about creating an invisible mannequin
effect that highlights the clothing in the most natural & appealing way.
Below are some of the most important practices & short pro tips every editor should know.
Keep Layer Masks Non-Destructive
One of the best practices in the professional ghost mannequin process is to use layer masks instead of permanently erasing parts of the image. This assures you can always refine, restore, or adjust any area without losing pixel data.
By keeping edits non-destructive, the invisible mannequin effect looks more natural & flexible. For example, if a sleeve or collar
doesn’t blend properly, you can simply adjust the mask rather than starting over. This approach maintains both speed & precision.
Check Alignment at 200% Zoom
When combining the front product photo with the inner neck shot, alignment errors are common. Professionals recommend checking alignment at 200% zoom or higher. This magnified view allows you to catch even the smallest misplacement, ensuring seams, edges & fabric folds look flawless.
A misaligned neckline can easily reduce visual credibility, so zooming in becomes a crucial step.
Perfect alignment makes ghost mannequin product photos balanced & realistic on e-commerce platforms.
Save Presets for Faster Editing
Another important tip is to save your Photoshop (actions & adjustments) presets. Many e-commerce businesses work with thousands of product images, as efficiency is key.
Presets for color correction, shadow adjustment & export settings save hours of repetitive work. With these shortcuts, you can maintain consistency across an entire catalog while speeding up the invisible mannequin effect process.
Maintain Natural Lighting & Shadows
While creating the ghost mannequin effect, always preserve natural-looking shadows & highlights. Flat images without depth appear artificial, whereas subtle shadows under collars & inside sleeves add realism. Using the Brush Tool at a low opacity on the mask helps refine these areas gradually.
These tips also help answer common questions beginners have, such as how to keep edits flexible, avoid mistakes & achieve a polished look.
FAQs.
1. Can I apply the invisible mannequin Photoshop technique without
a neck insert image?
While it is possible to remove the mannequin without a neck or inner-layer insert, the results may look hollow or incomplete,
especially around collars & sleeves.
The inner neck image ensures continuity, making the process more professional. Using an insert allows for seamless blending,
proper depth & natural 3D appearance, which is crucial for e-commerce product images.
2. How long does a Ghost Mannequin edit usually take?
The time depends on complexity & experience. For a simple garment with clear lighting, a professional editor can complete the ghost mannequin process in 15-30 minutes per item.
More detailed garments, such as those with folds, intricate stitching, or multiple layers, may take 45-60 minutes. Beginners might need
more time initially, but following the step-by-step workflow & using keyboard shortcuts significantly improves speed & accuracy.
Conclusion
The ghost mannequin effect remains one of the most practical & widely used techniques in modern product photography, especially for
e-commerce & fashion brands. By following a structured ghost mannequin workflow, editors can transform ordinary mannequin-based images into flawless, 3-dimensional visuals that highlight every detail of the garment.
For many companies, outsourcing this task to a specialized photo editing agency ensures the best results. Outsourcing provides consistent quality, faster turnaround times & the ability to scale large volumes of product images without compromising detail.
Ultimately, whether you are an emerging brand or an established retailer, practicing the ghost mannequin workflow or outsourcing it to a trusted editing company which remains the smartest way to stand out. This streamlines production, elevates presentation & builds customer trust in your product.
Hadi Zaman is a marketing specialist and content writer who loves tech, story writing, and content creation. With years of experience, he creates easy-to-read content that connects with readers. Inspired by new ideas and personal experiences, Hadi makes complex topics clear and relatable.